It looks like I've linked you here myself. Linking people to a blogpost I wrote is often a bit akward, especially at work.
I likely shared this blog in an attempt to further a conversation. Usually the post does a better job at succinctly sharing information than I could by talking.
In any case, I hope me sharing this post doesn't come across as humblebragging, that's really the opposite of what I'm trying to achieve.
Thanks for reading!
My Smart Sauna7 min read
Using ESPHome and Home Assistant
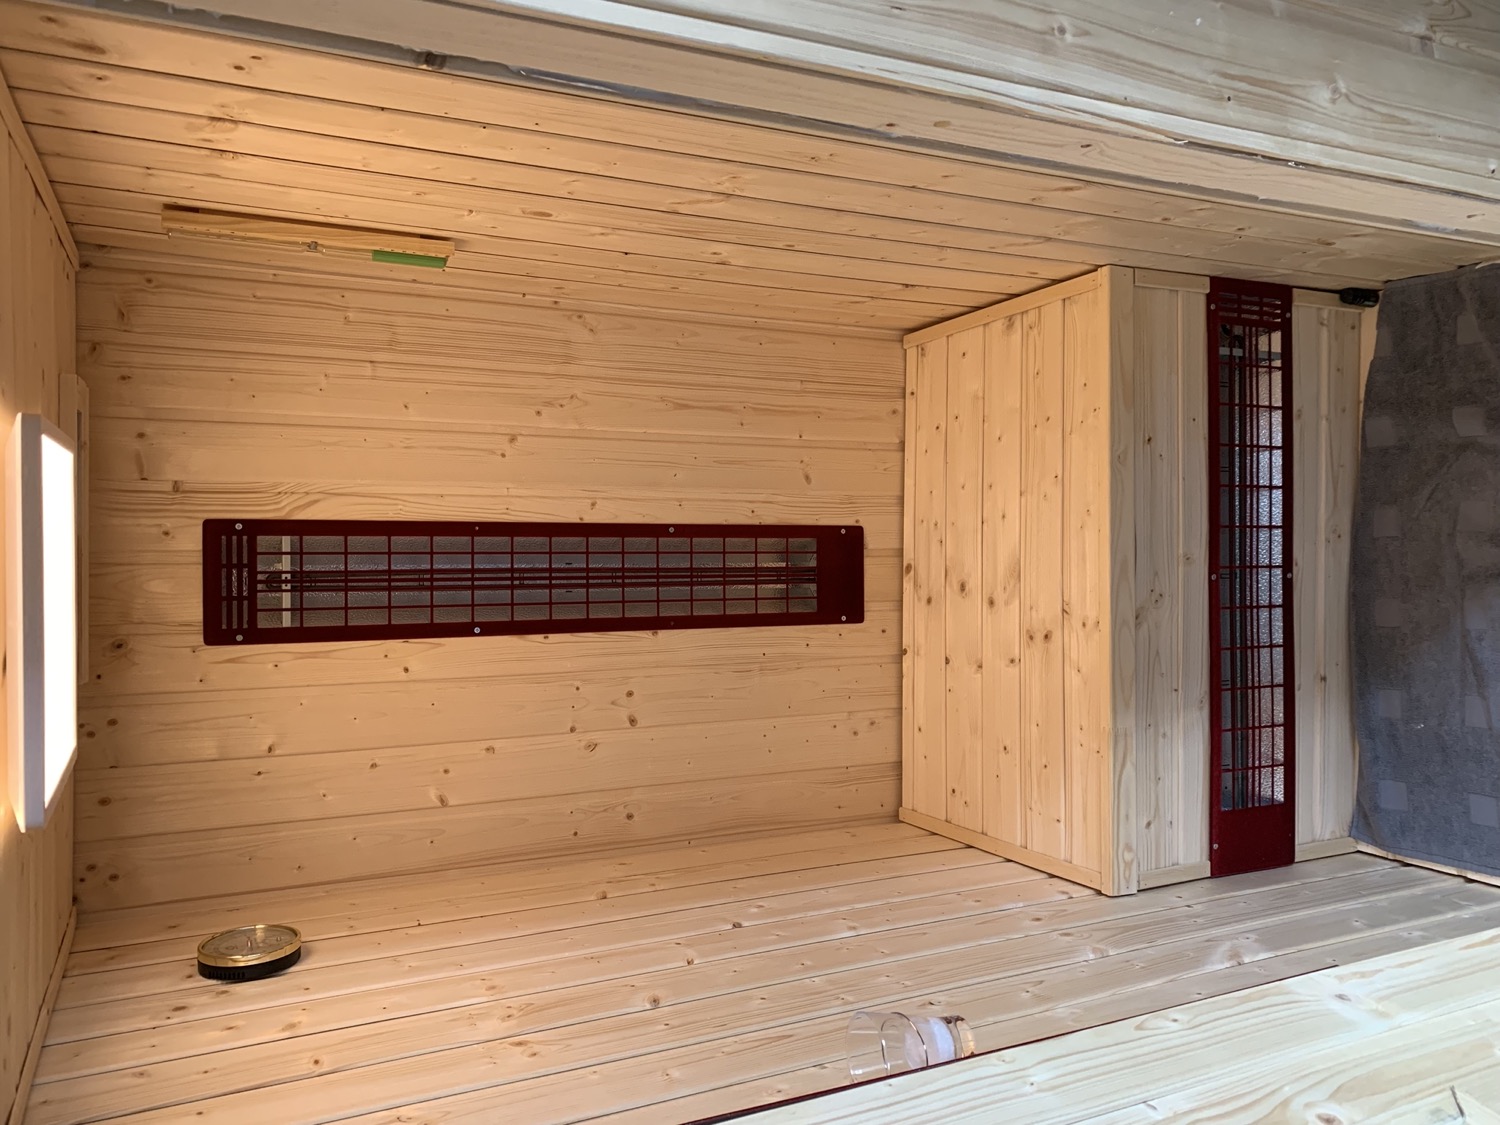
The inside of my infrared sauna.
In early 2021, I built a single person infrared sauna, from scratch. While I have been using the sauna frequently since then, up until recently I still had to operate it manually by plugging in individual infrared heaters.
As a self-proclaimed home-automation aficionado that’s obviously not something I could let slide.
I decided to make the sauna a bit smarter by adding:
- Temperature and humidity sensors: to satisfy the data-nerd in me.
- Remote switching of the each infrared heater: to be able to pre-heat the sauna remotely as well as to control sauna temperature more granularly.
Custom Electronics Build
As a heavy Home Assistant user, integration with that platform was a hard requirement. That still leaves an almost infinite amount of options though, as Home Assistant integrates with just about everything you can think of. As I wanted to try out some things I hadn’t used before, I decided to go for a custom electronics build.
My building blocks of choice:
- Micro-controller: NodeMCU ESP32 board from AZ-Delivery
- Temperature and environment sensing: The popular BME280 sensor
- Remote switching of the infrared heaters: A 4-relay board from AZ-Delivery
- Micro-controller software: ESPHome, which I had used multiple times before (automated curtains, window opener).
I first tried everything out on a breadboard - that really only took 30 minutes.
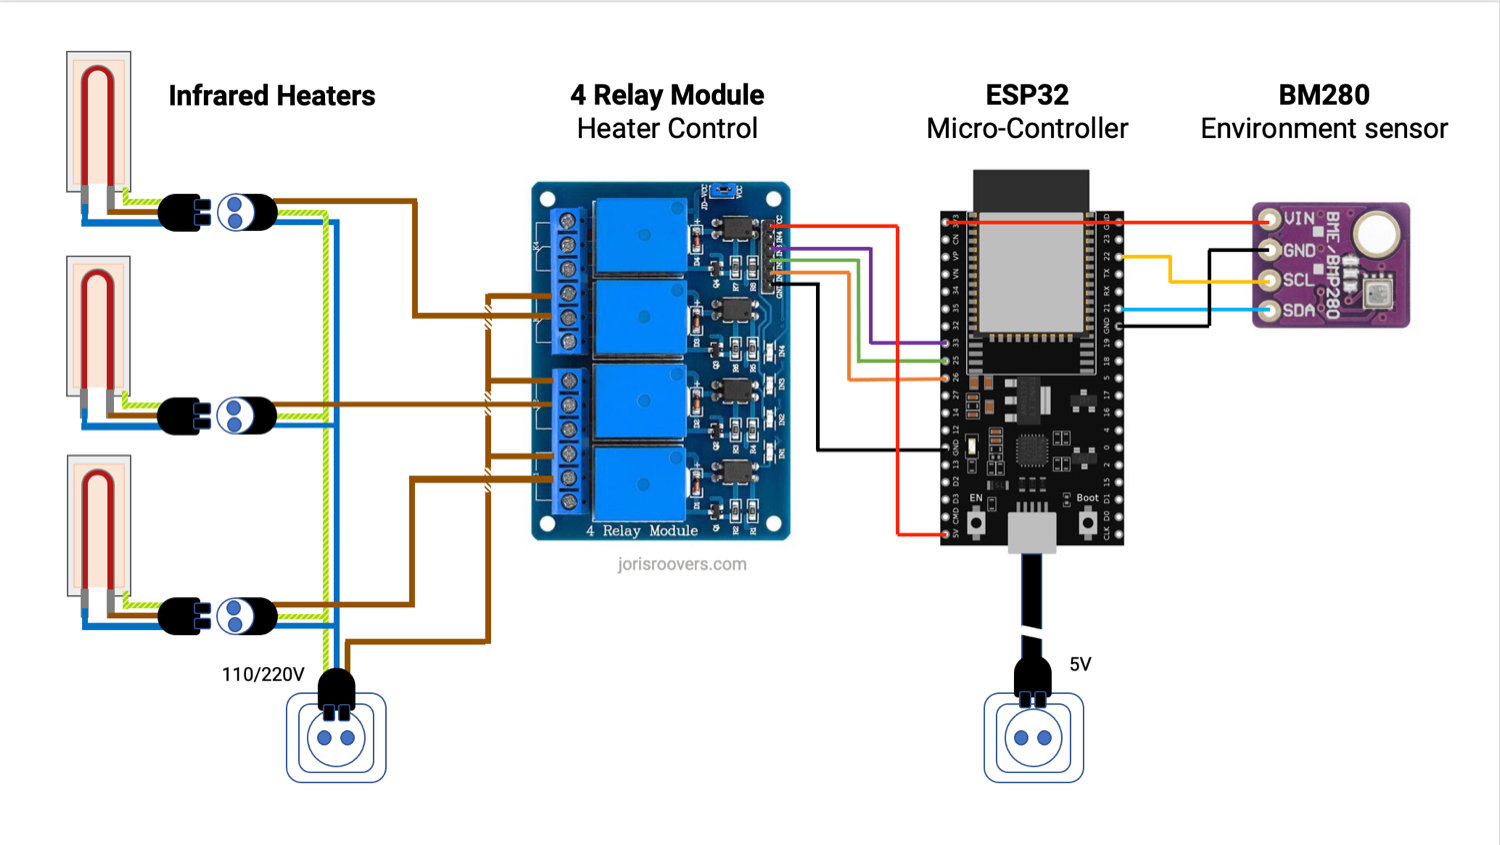
Wiring Diagram
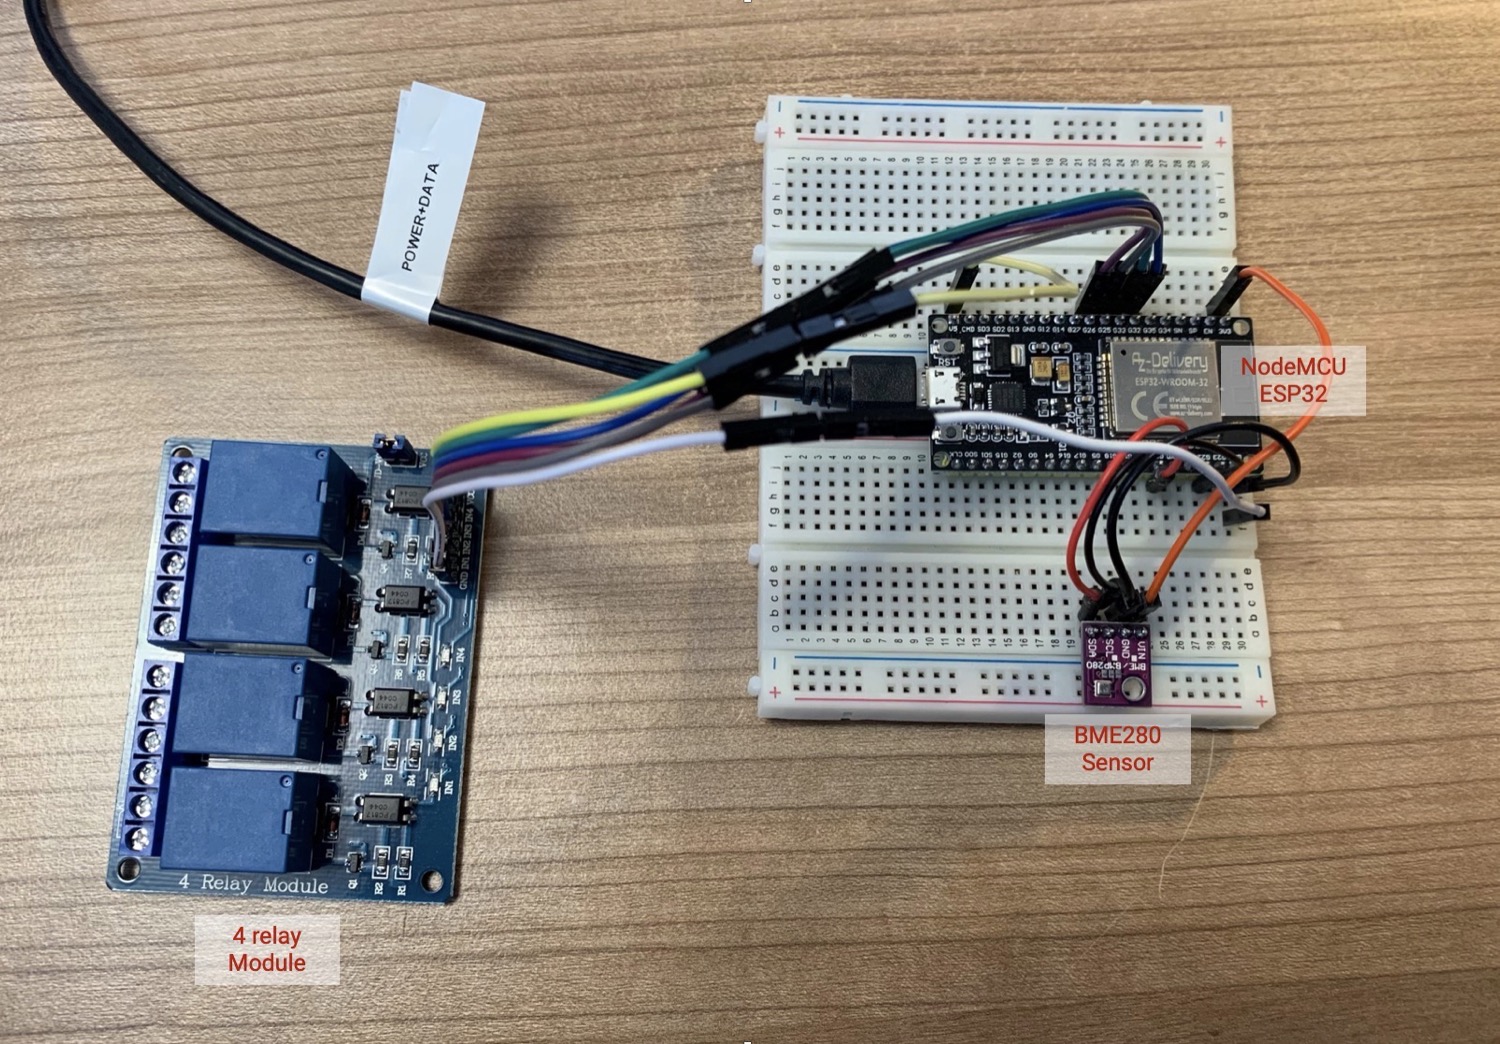
Prototype build on breadboards.
After validating everything worked, I spend a few hours making the circuit production ready: soldering the ESP32 on a prototype board, adding connectors to longer signalling wires and wiring the relays.
I also added power plugs and sockets between the relay module and the infrared heaters. This allows me to quickly reconfigure the sauna to function without home automation and not need a screwdriver or soldering iron to do so. That makes everything more bug- and future-proof.
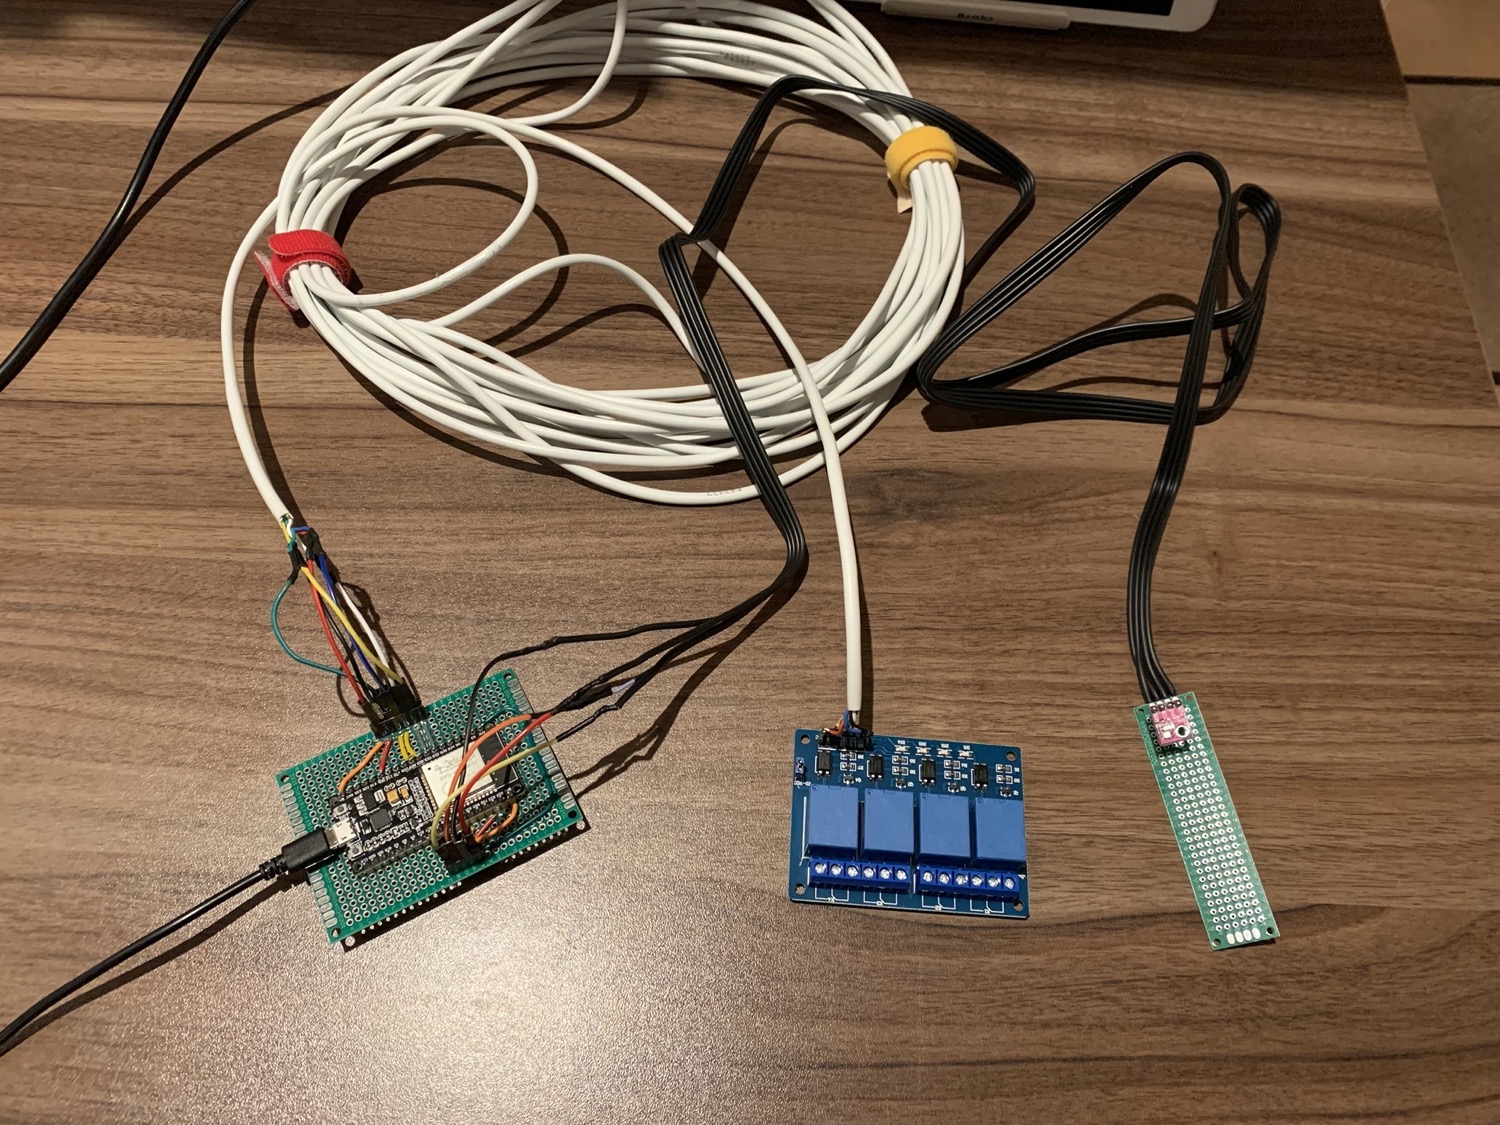
Electronics all soldered up, ready to go.
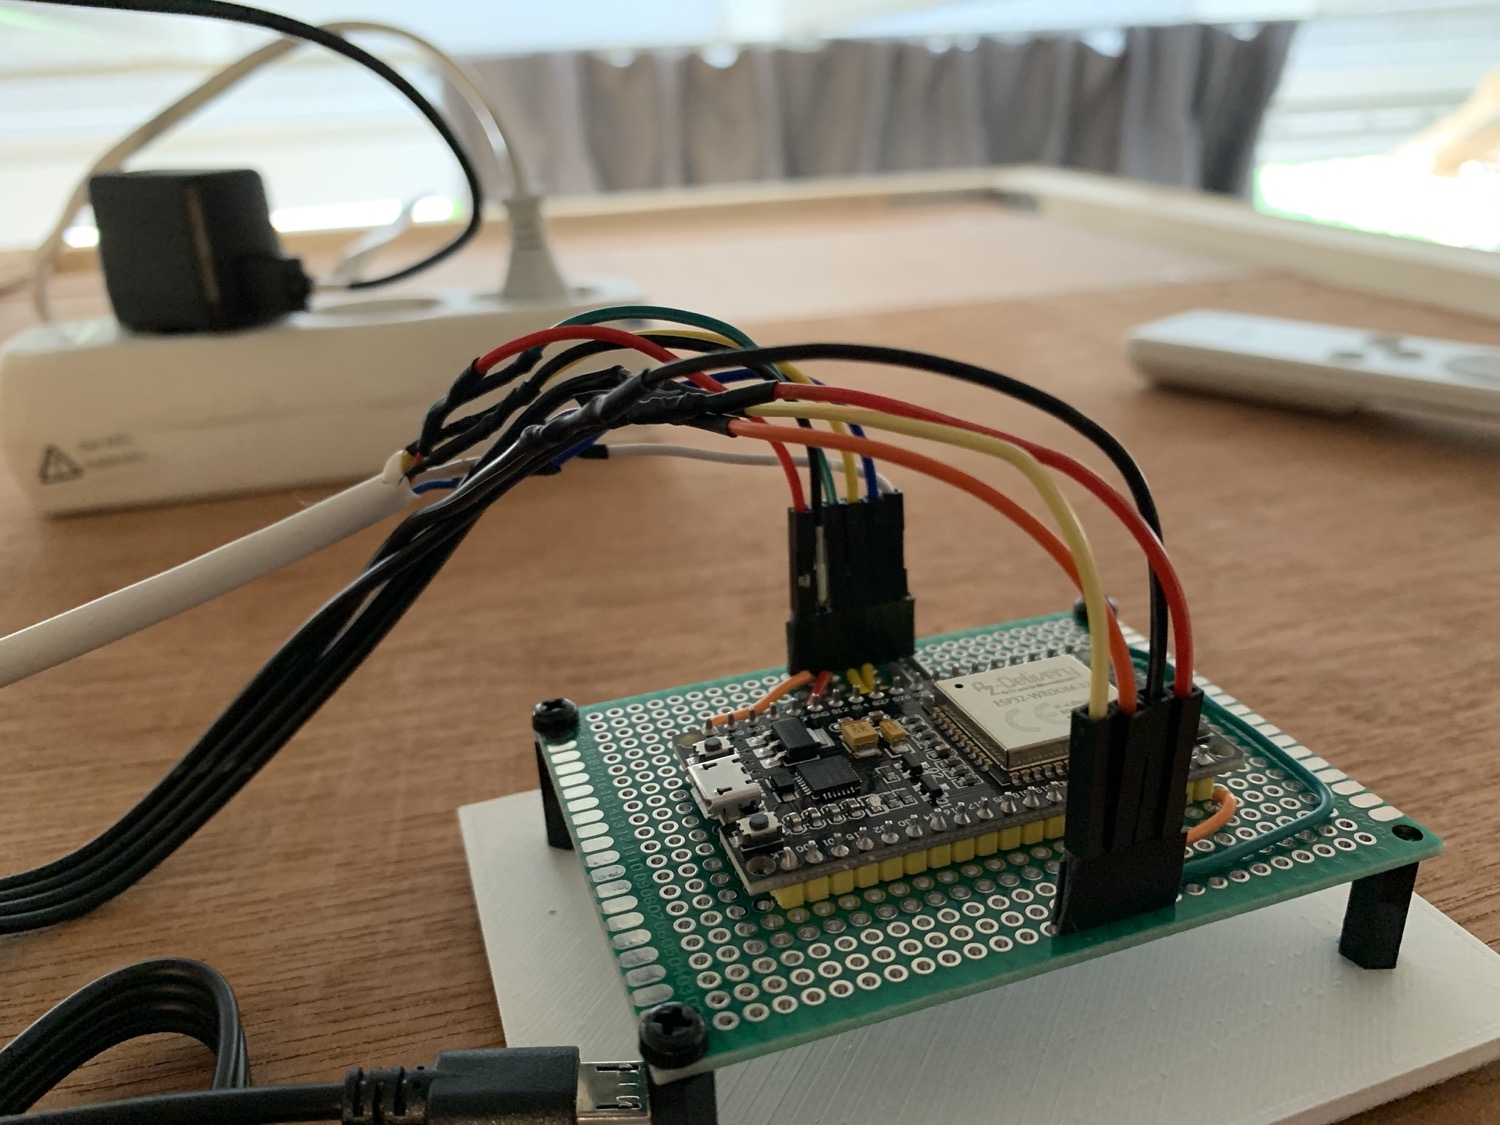
The controller as it currently sits on top of the sauna. I mounted it on top of a simple 3D printed plate using some PCB spacers. I didn’t add a full enclosure as it’s not really necessary - maybe something for the future.
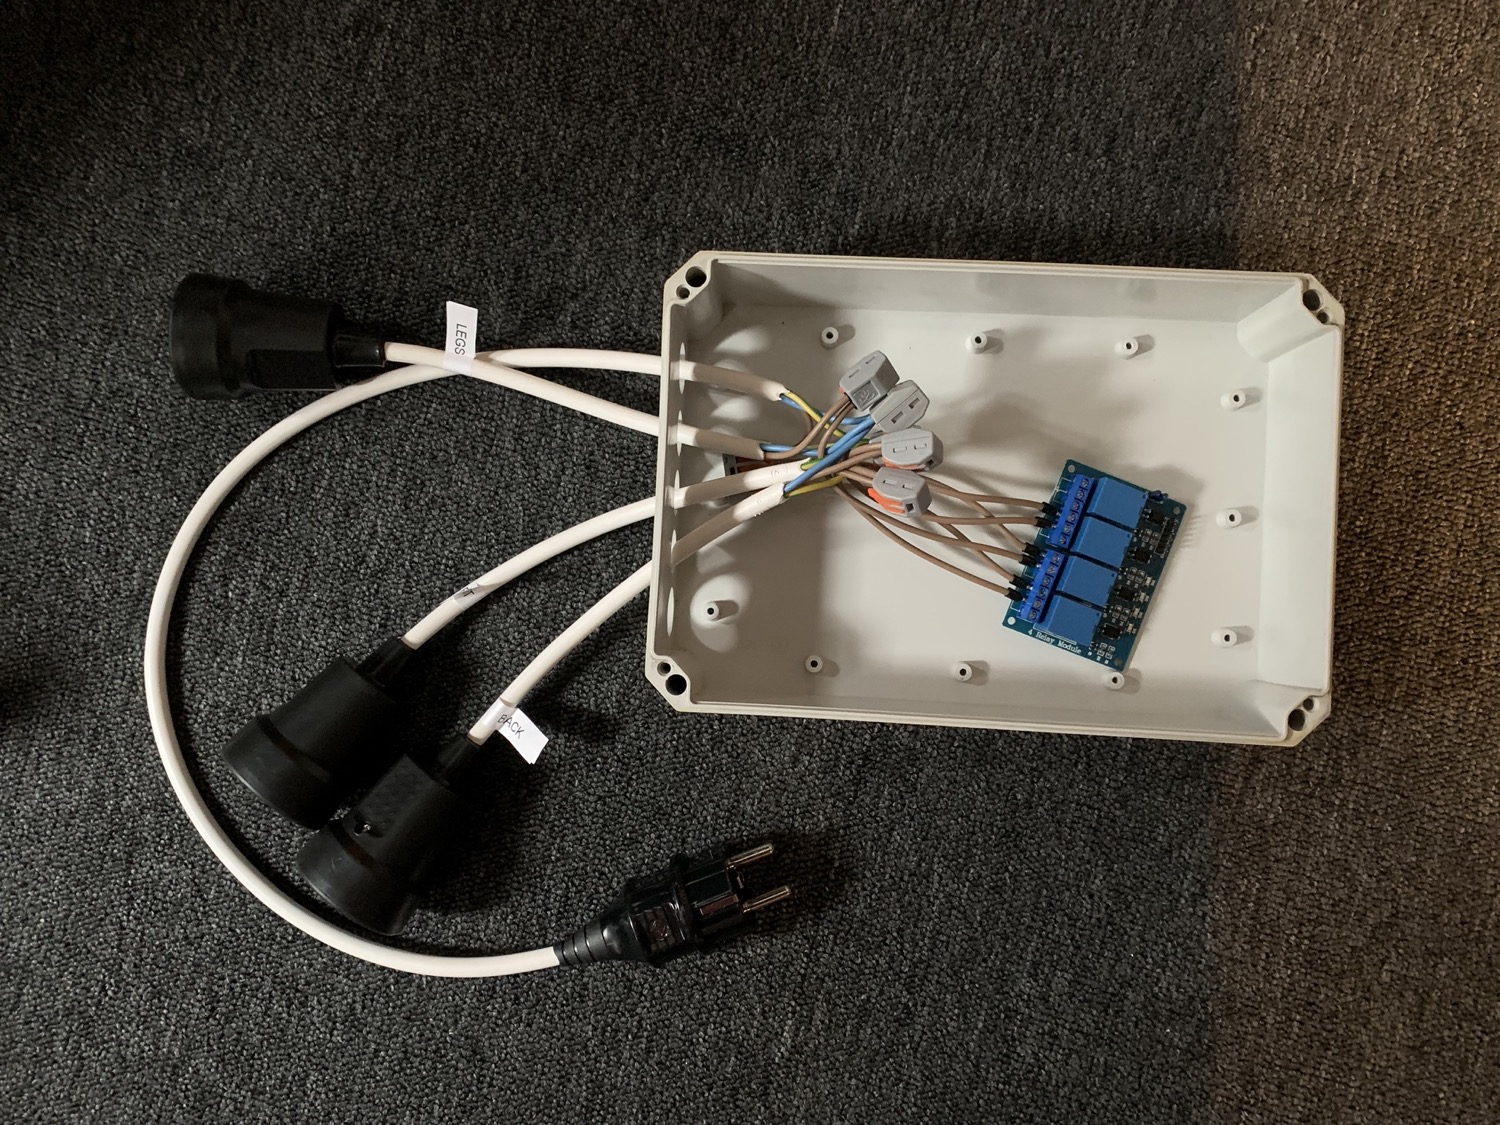
The 4 relay module wired up to plugs to be used by the infrared heaters. I put the relay module and wires in an old electronics box I still had laying around.
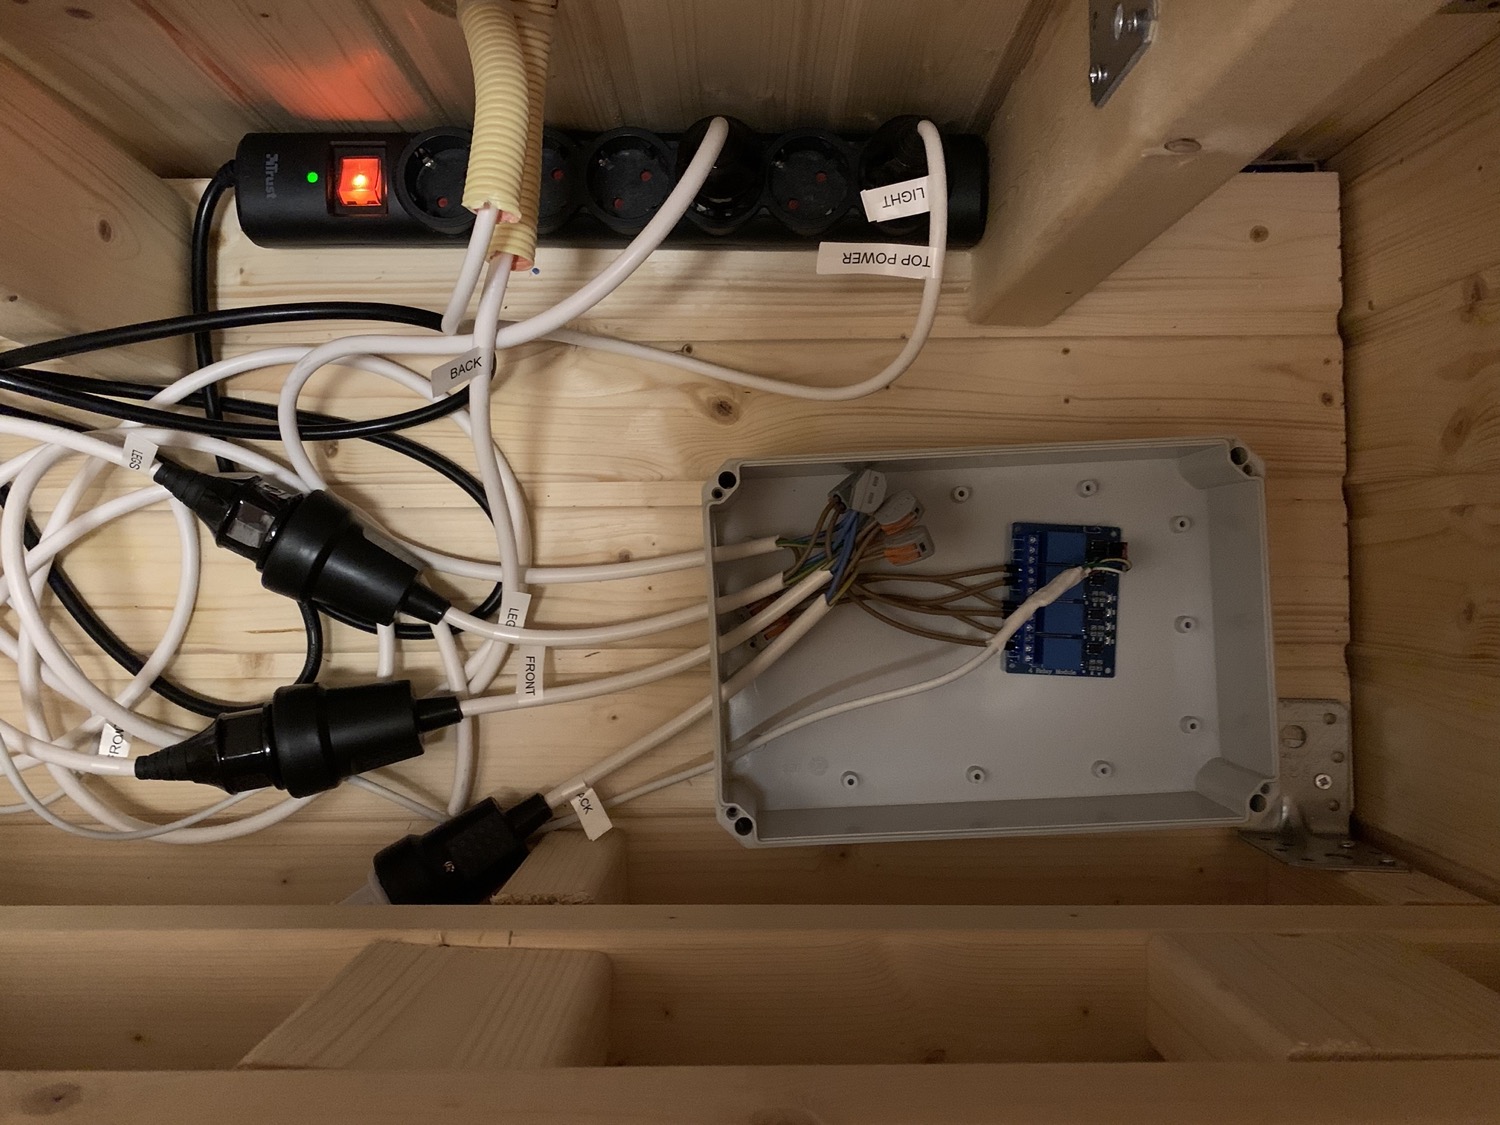
Relay box installed underneath the bench in the sauna.
BME280 not working?
One thing I noticed is that the BME280 environment sensor was reporting incorrect temperatures when compared to other thermometers mounted right next to it. At room temperature the sensor was accurate, but as soon as I started heating the sauna it would very quickly report high temperatures, often 10 or more degrees off.
For reference, the BME280 sensor supports temperatures up to 85°C (±1.0°C accuracy). As the sauna doesn’t go above 60°C, the sensor itself should be more than capable of supporting this. I also verified that the particular sensor itself wasn’t faulty by swapping it out with a different one - same problem.
After a bunch more sauna sessions and head scratching, I realized that the sensor was probably getting directly hit by infrared rays coming from the heaters. Similar to how a metal or dark-colored object will get hot in direct sunlight, this leads to incorrect measurements of the ambient temperature.
I solved this by embedding the BME280 sensor in a small wooden enclosure I made with my newly acquired laser cutter - the issue disappeared instantly. Problem solved 😁
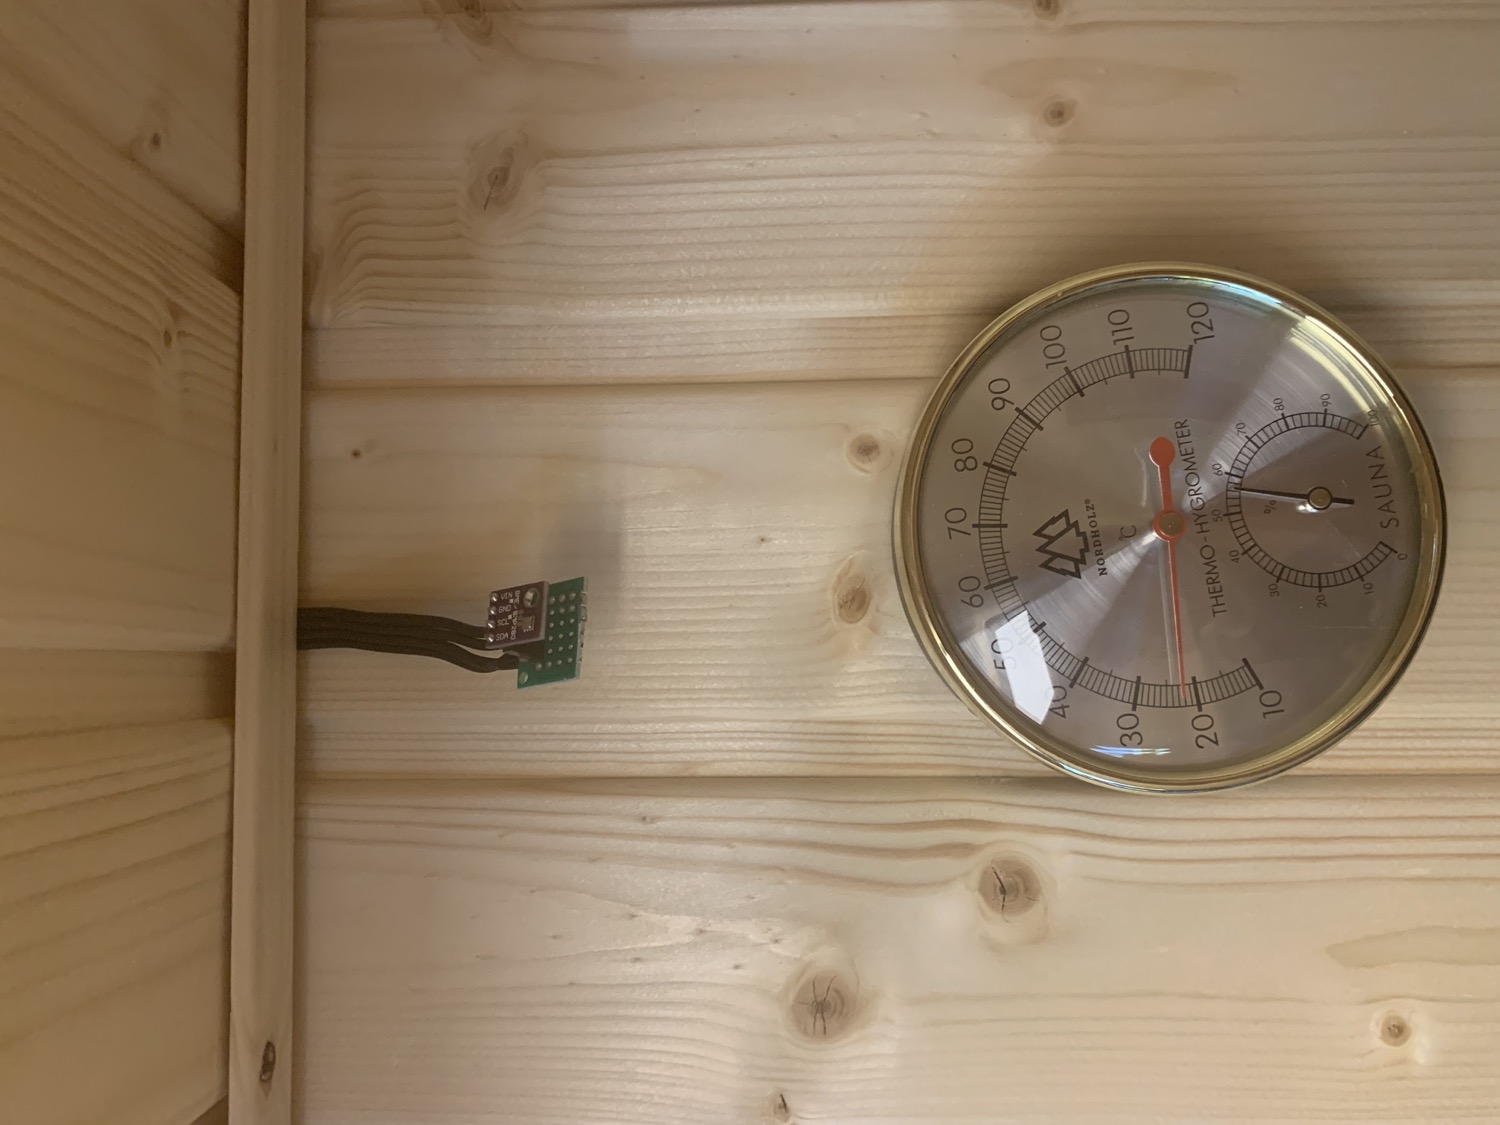
How the BME280 sensor was originally mounted in the sauna - unprotected. Note the analog temperature gauge below. That gauge was how I first found out that the BME280 temperature was so much off.
 and added the holes using the lasercutter software [Lightburn](https://lightburnsoftware.com/).](bme280-with-enclosure.jpg)
The BME sensor inside a lasercut enclosure. I generated the box template using the excellent boxes.py tool and added the holes using the lasercutter software Lightburn.
ESPHome and Home Assistant
After that, the only thing left was polishing the ESPHome config a bit and creating a Sauna dashboard in Home Assistant to see and control everything.
If you’ve never used ESPHome before, you should really try it out. The entire YAML configuration file for this project is 75 lines long and includes the BME280 config and the relay module as a set of GPIO switches. No coding required whatsoever.
After flashing the ESPHome config to the ESP32 micro-controller using a single CLI command (esphome run sauna.yaml), I just needed to run the ESPHome integration setup wizard in Home Assistant to automatically add the different sensors provided by the BME280 and the relays to Home Assistant.
Even after using ESPHome in multiple other projects, I keep being amazed with how easy ESPHome makes the integration with Home Assistant and how reliable it is afterwards.
        substitutions:
  deviceid: sauna
  devicename: Sauna

esphome:
  name: sauna
  platform: ESP32
  board: esp32dev
  # Some custom options required for AZ Delivery board
  # https://github.com/esphome/feature-requests/issues/609
  platformio_options:
    platform: espressif32
    board: az-delivery-devkit-v4
    board_build.mcu: esp32
    board_build.f_cpu: 240000000L

wifi:
  ssid: !secret wifi_ssid
  password: !secret wifi_password
  manual_ip:
    static_ip: !secret wifi_static_ip
    gateway: !secret wifi_gateway
    subnet: !secret wifi_subnet

# Enable Home Assistant API
api:
  password: !secret api_password

# Enable Over-The-Air updates
ota:
  password: !secret ota_password

logger:

i2c:
  sda: 21
  scl: 22

switch:
  - platform: gpio
    id: ${deviceid}_front_heater
    name: ${devicename} Front Heater
    pin:
      number: 25
      inverted: True

  - platform: gpio
    id: ${deviceid}_leg_heater
    name: ${devicename} Leg Heater
    pin:
      number: 26
      inverted: True

  - platform: gpio
    id: ${deviceid}_back_heater
    name: ${devicename} Back Heater
    pin:
      number: 33
      inverted: True

# https://esphome.io/components/sensor/bme280.html
sensor:
  - platform: bme280
    temperature:
      id: ${deviceid}_temperature
      name: "${devicename} Temperature"
      oversampling: 16x
    pressure:
      id: ${deviceid}_pressure
      name: "${devicename} Pressure"
    humidity:
      id: ${deviceid}_humidity
      name: "${devicename} Humidity"
    update_interval: 3s
    address: 0x76
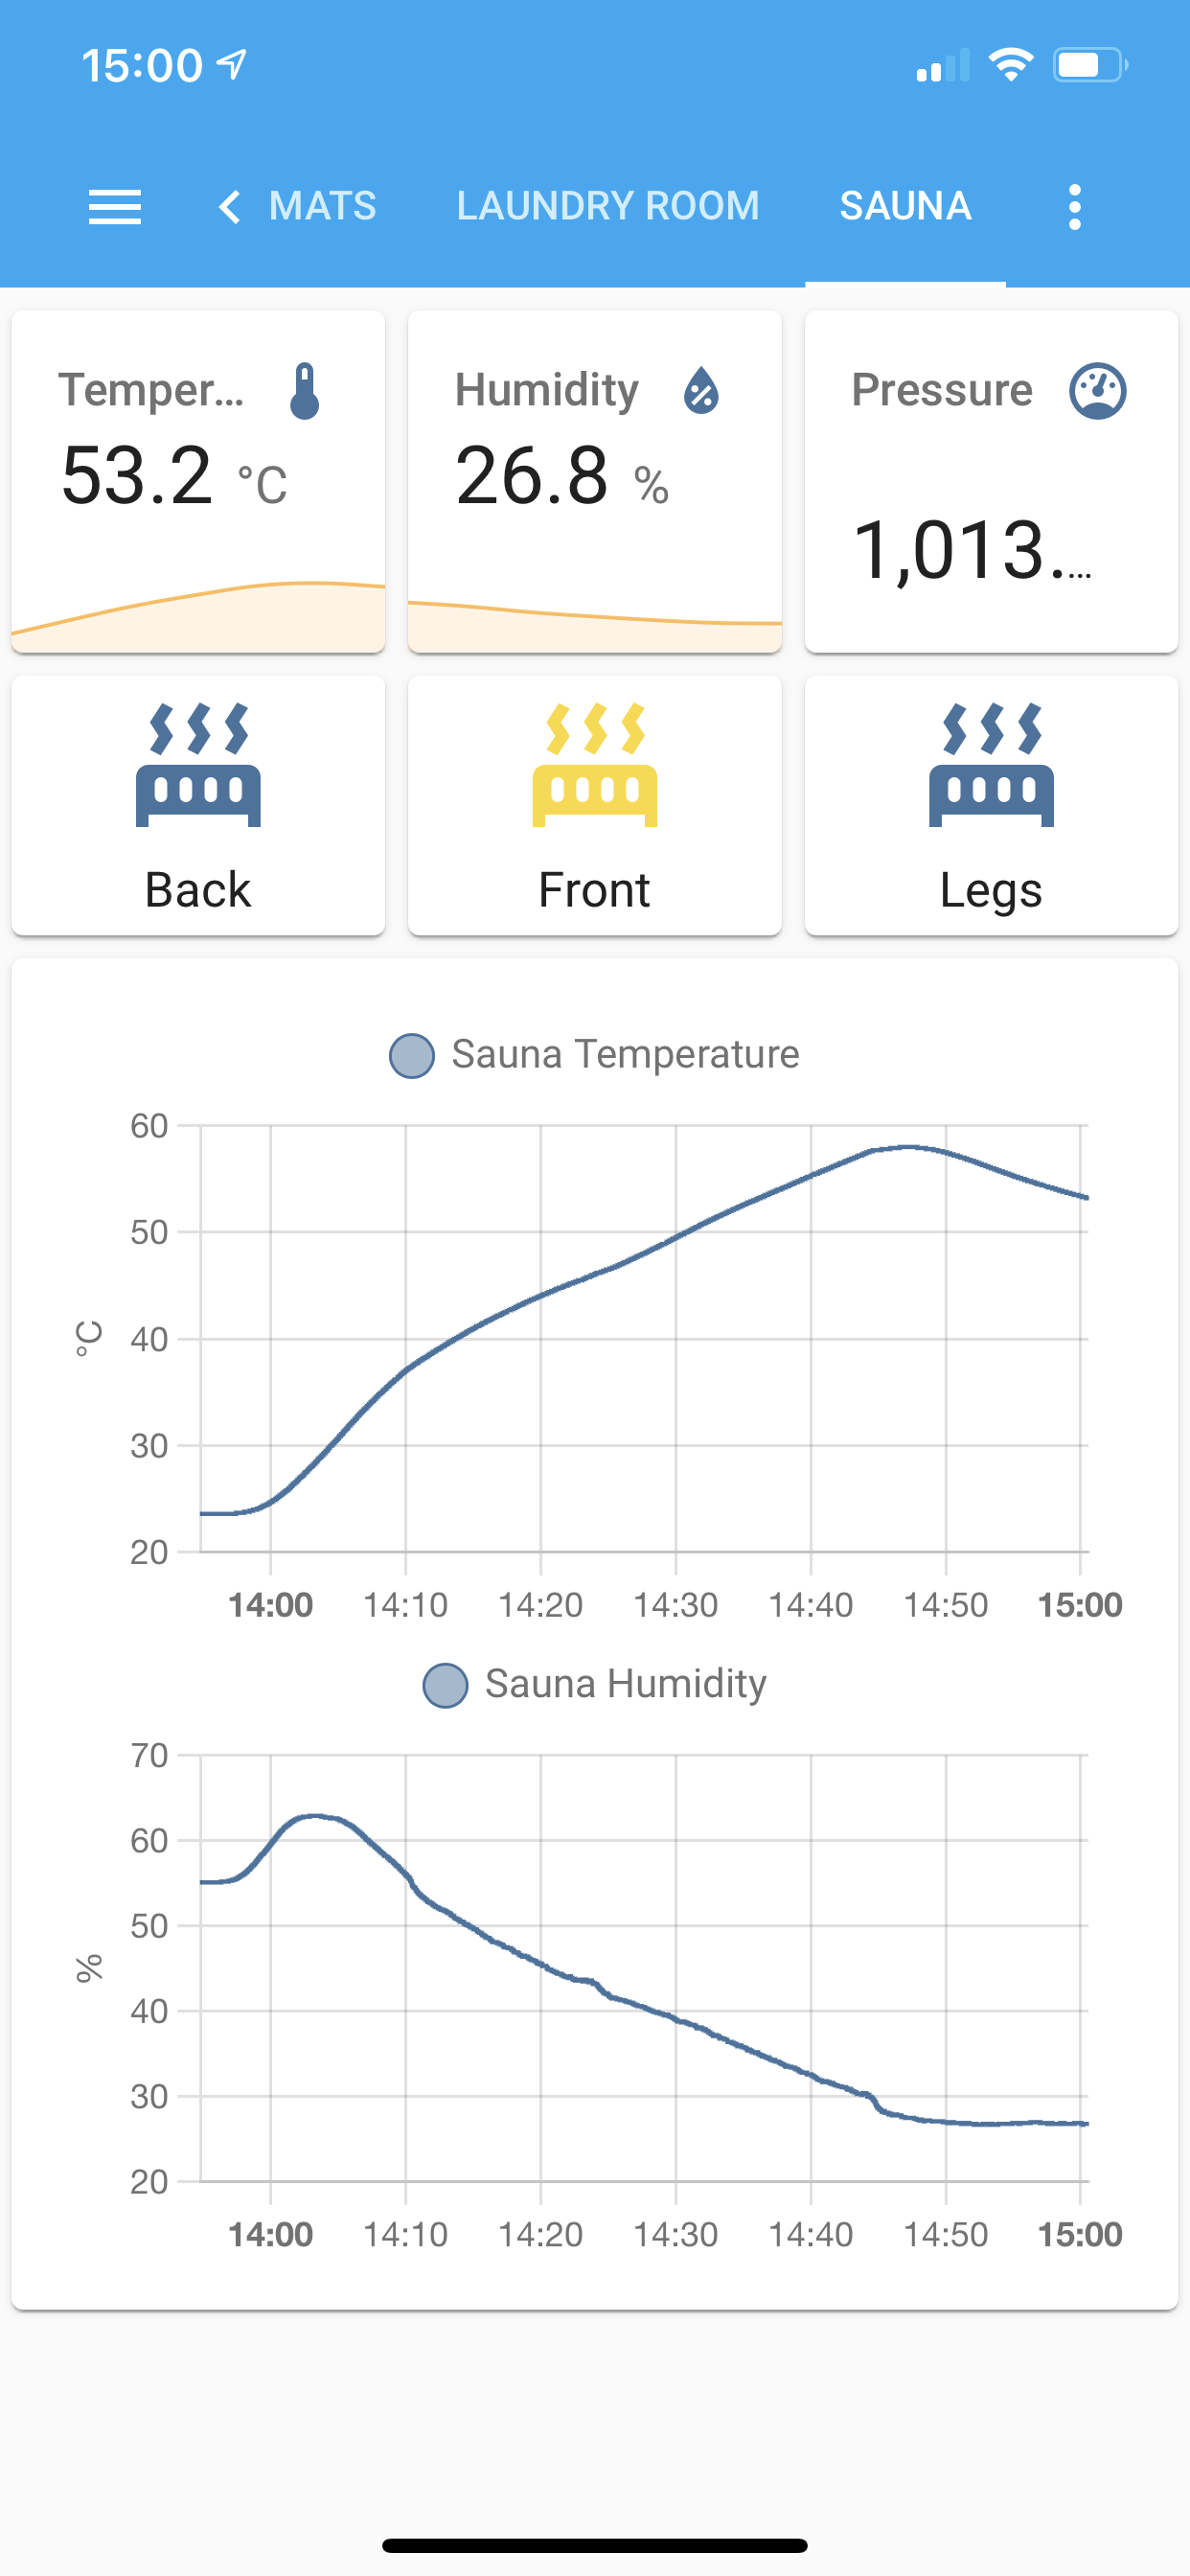
Sauna dashboard in Home Assistant, as shown in on the iOS app.
As of now, I mostly still “manually” flip individual infrared heaters on and off through my phone, but of course, using Home Assistant it would be trivially easy to implement specific automation rules around it.
Potential Improvements
The above describes the state of things at the time of posting, but there’s tons of potential improvements I’ve been thinking about:
- Remote light control: I’m currently just using the remote control that came with the LED panel. I’d like to explore using WLED to add smart control.
- Smart speakers: From experience I know that in a sauna this is a bit gimmicky, but I might still consider it (just because).
- Proper climate control: i.e. the ability to set and hold a specific target temperature. I’m thinking I could use ESPHome’s PID Controller feature.
- Control Panel: Mount a touch control panel to the sauna wall to control the sauna without the need of a phone or computer. I’ve been looking at Nextion.
- Statistics Dashboard: Build a dashboard in Home Assistant or Grafana to show fun stats (total time in sauna over time, avg session length, avg. temperature, etc).
- Personalized sauna profiles: Different sauna programs (short and hot, long and less hot, temperature intervals, etc) customizable for different people.
I’m not sure whether I’ll end up doing do any of these, but it never hurts to have a backlog of things to work on 😎. If I do, I’ll update this post accordingly.
Worth it?
It’s easy to argue that installing home automation in a sauna is overkill. Indeed, a few manual on-off switches and a cheap thermometer pretty much achieve the same thing for significantly less money and effort. They also don’t require a phone or computer to operate.
But of course, that argument can be made about most home automation projects.
For me, the goal is not to save time or effort, it’s about learning and having fun along the way. The convenience it brings afterwards is more of an added bonus.
So worth it? Yes, 100%!